While Google continues to make it easier to add your own custom data to their maps using their
Google Maps API, there's an even easier way to see your cache data in Google Maps without writing a single line of code. All you need is some on-line storage space (which you probably already have through your Internet Service Provider or web-mail account) to store a single Google Earth KML file.
The first thing you need to do is decide which caches you want to view in Google Maps, and then convert that list of caches into a KML file. We've talked about the versatility of the geocaching database program,
GSAK before. Well, it also allows you to export your cache data into KML format. Then, just copy that file to your a web site, and then enter the http address of that site, with the .kml file name at the end, into the Google Maps search box, and presto, your caches appear on the map.
Let's take an example. Say you want to see all the caches, in map form, available in my favorite summer vacation spot, Lake Tahoe. First, import your previously defined Lake Tahoe
pocket query from Geocaching.com into GSAK. Then, still using GSAK, export the Tahoe cache list to a Google Earth file that we'll call Tahoe.kml. Now, upload that file to an online server storage site, such as
Google Page Creator, which provides free web storage space to Google account holders. Finally, just open
Google Maps and in the search box, enter the http address of the kml file you just uploaded (in my case it's http://
username.googlepages.com/Tahoe.kml:
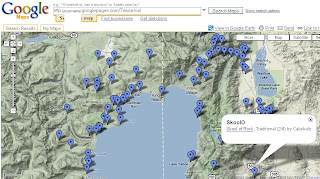
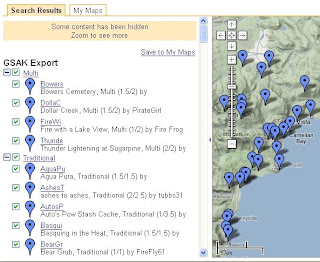
That's it! Very cool. Also, if you keep the left pane open, you'll see a list of all your caches sorted by cache type. You can click on any link, and the map will scroll to that cache and provide a pop-up box with the cache information:
This is great stuff, and nice because you can view your stored caches on any computer/laptop with internet access and a web browser. Give it a try - it's well worth the minimal effort that it takes to set up.
Cache On!


